NMPC Controller using ACADOS and ROS
Solver Design and Simulation using ACADOS Python Interface
First make sure you have successfully installed ACADOS
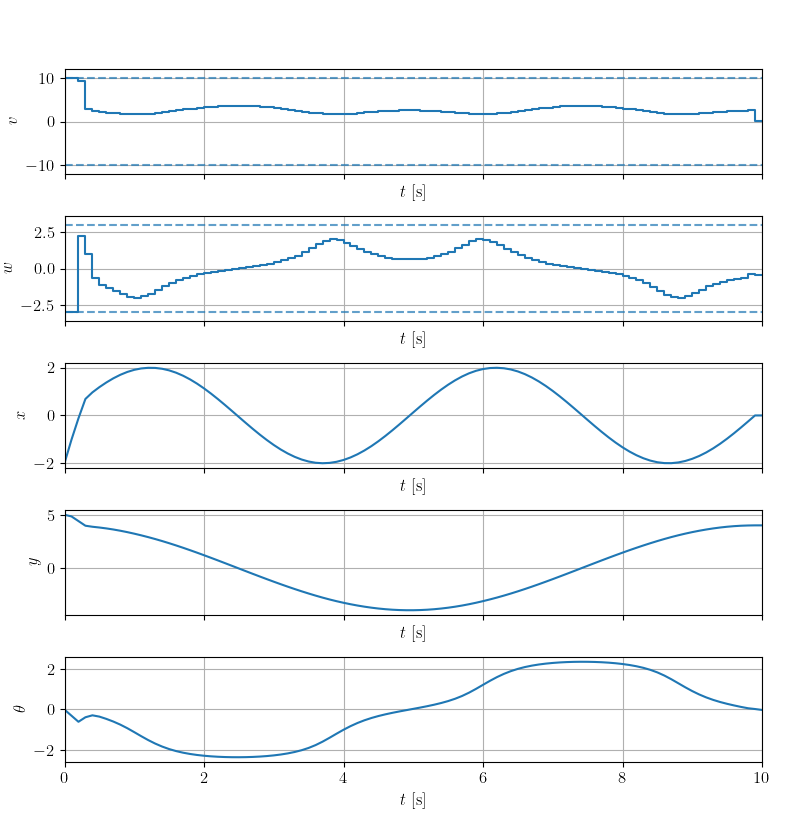
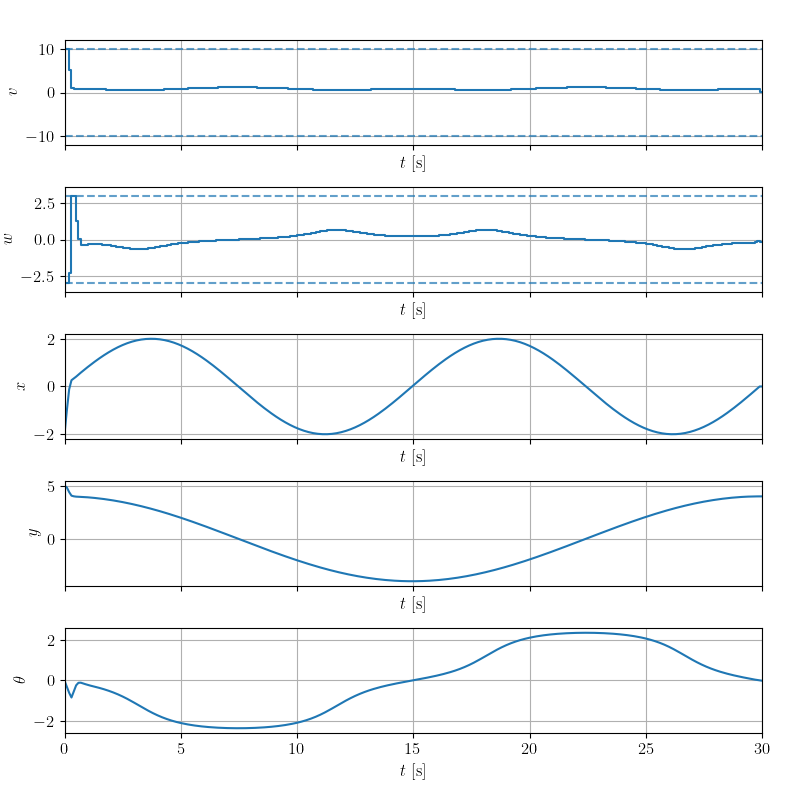
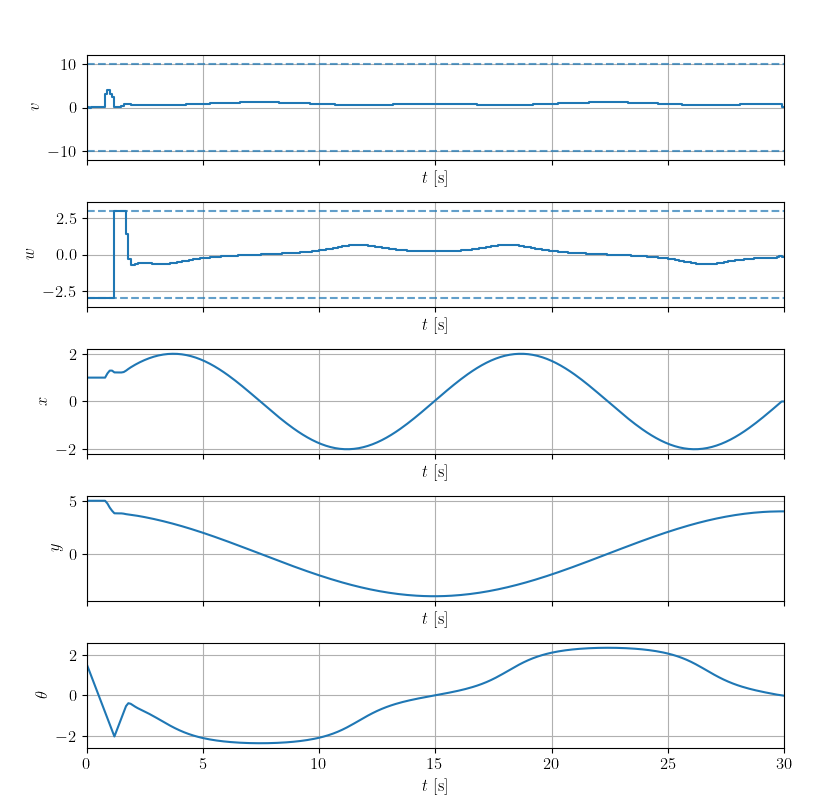
In this robot model, system input is u = [v, w] where v denotes the linear velocity of the vehicle and w denotes the vehicle’s angular velocity.
System state is X = [x, y, theta] where x and y denote to the x y coordinates of the vehicle’s position on the two-dimensional plane and theta denotes to the angle between the vehicle’s direction and the positive x-axis at two adjacent x and y coordinates.
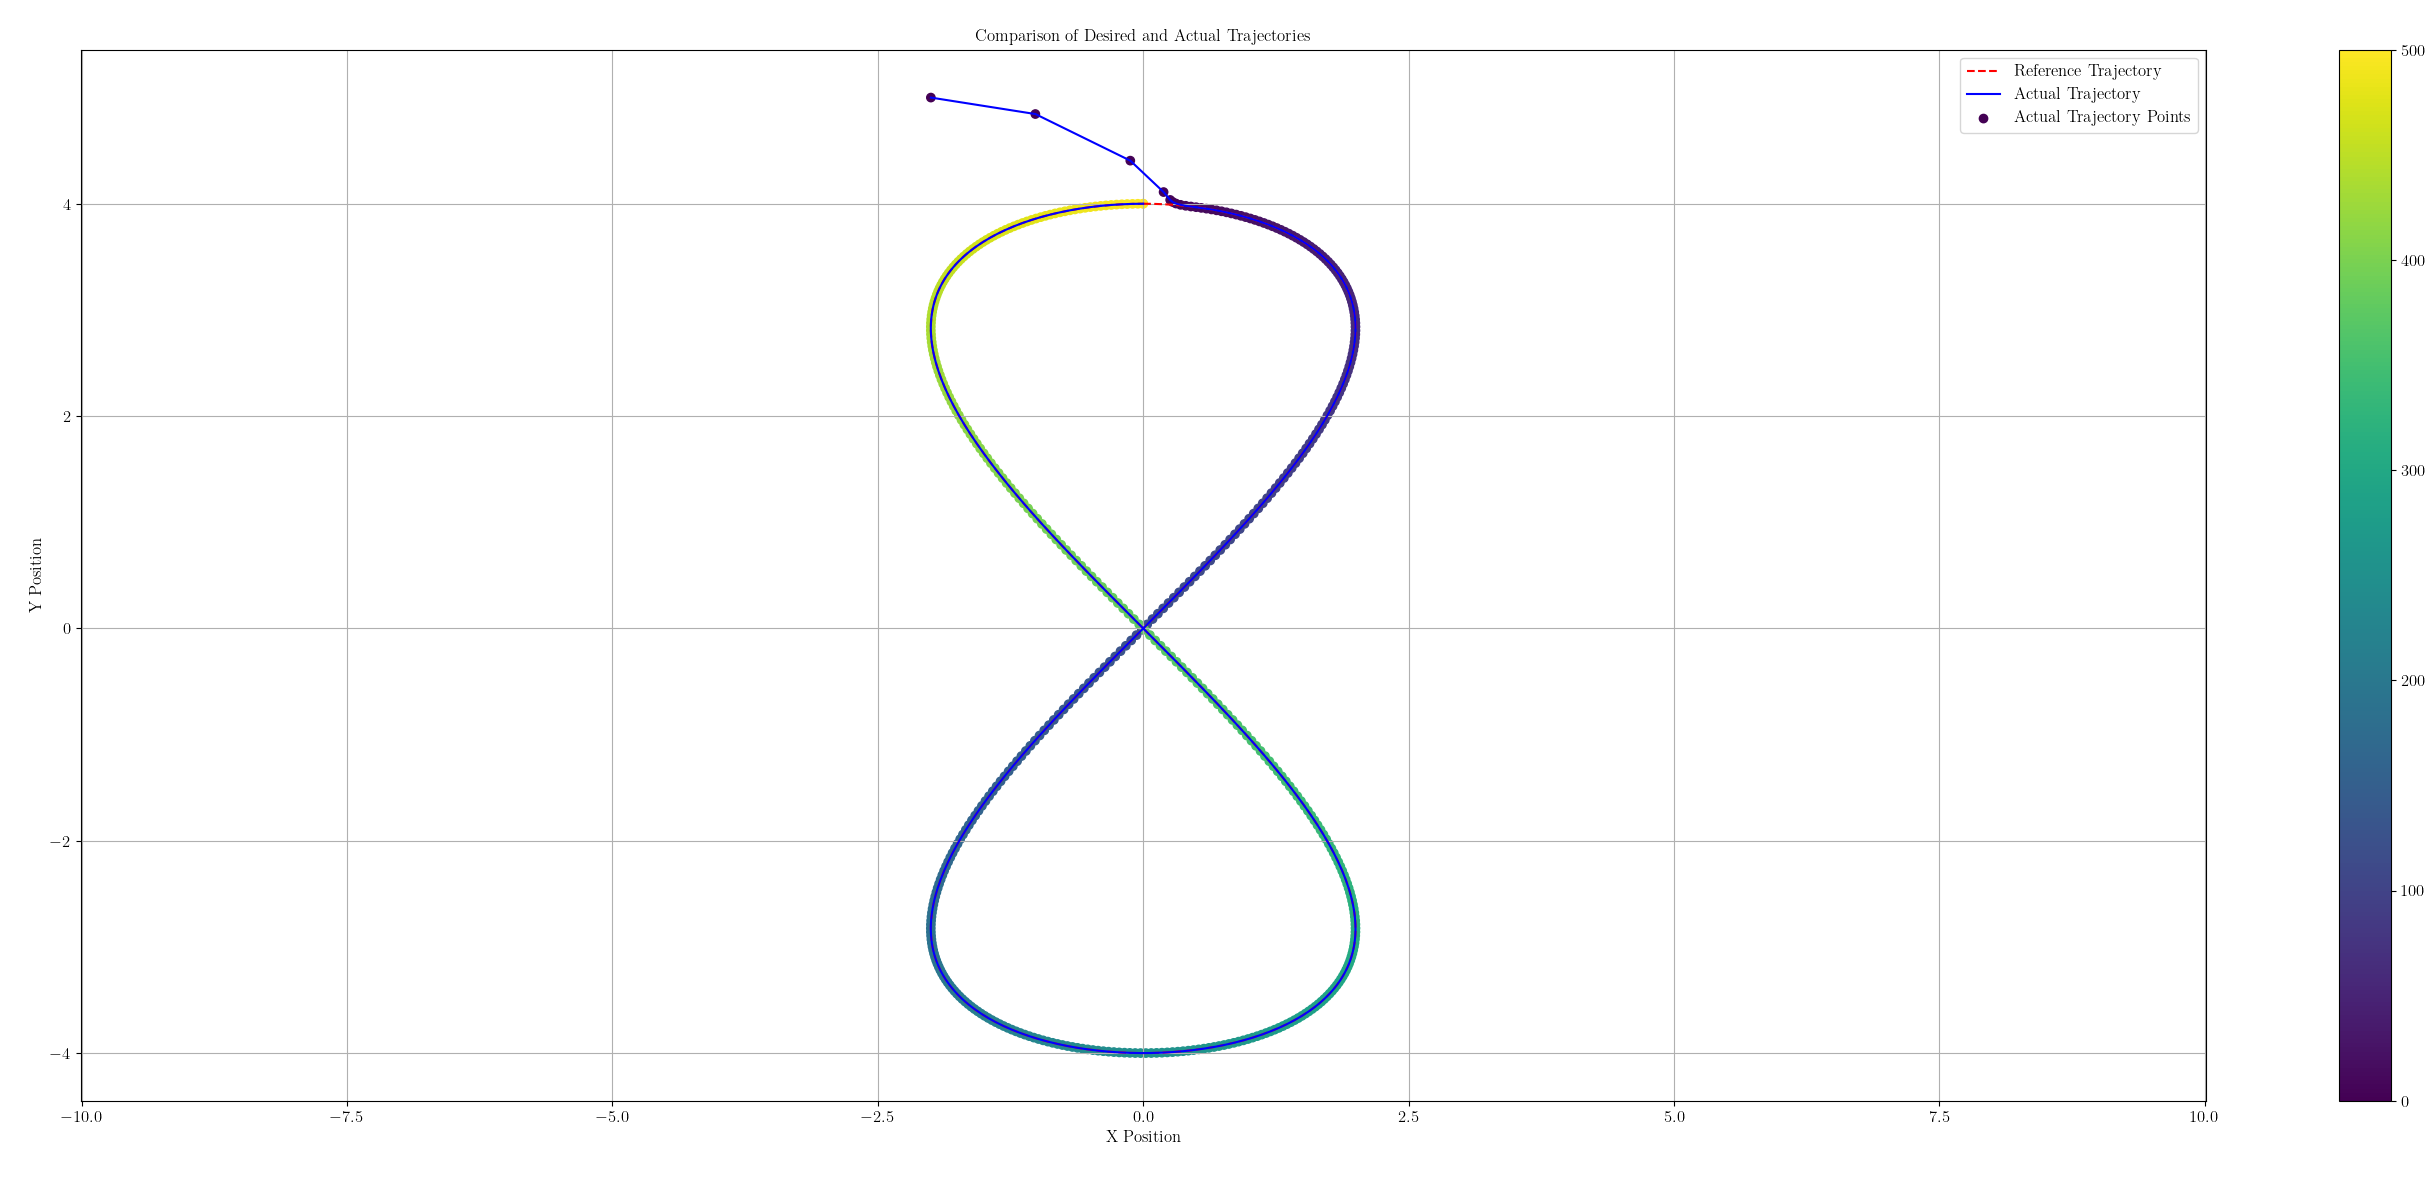
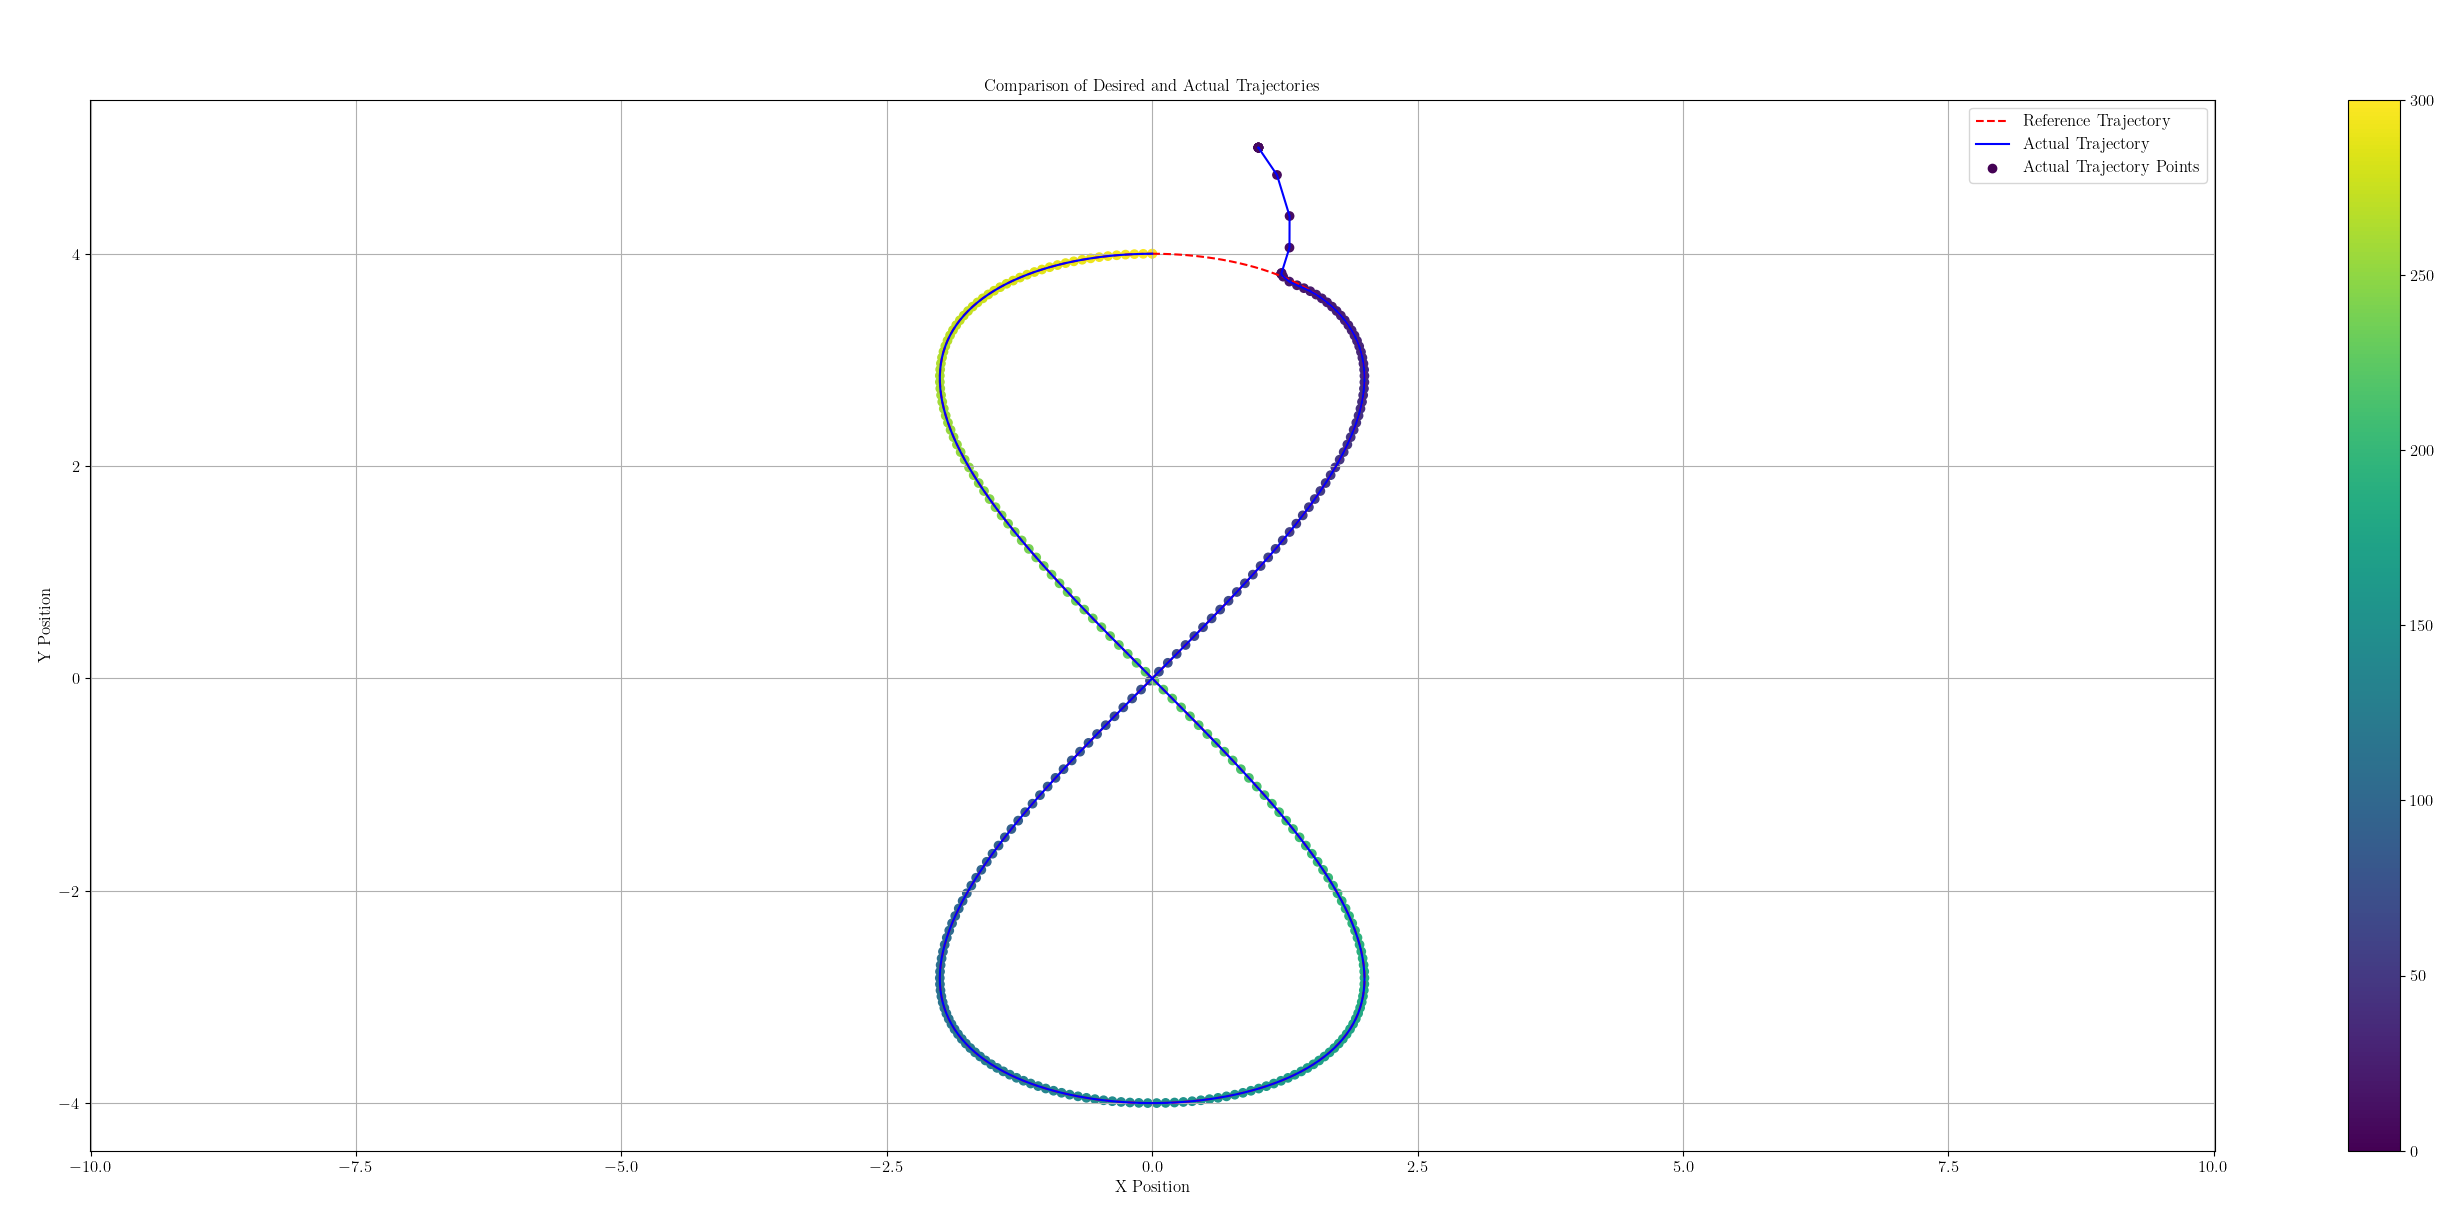
Below are simulations with three different point counts: a total of 100 points, a total of 300 points, and a total of 500 points.
The initial states for these three simulations is the same with X0 = [-2.0, 5.3, -0.00629628].
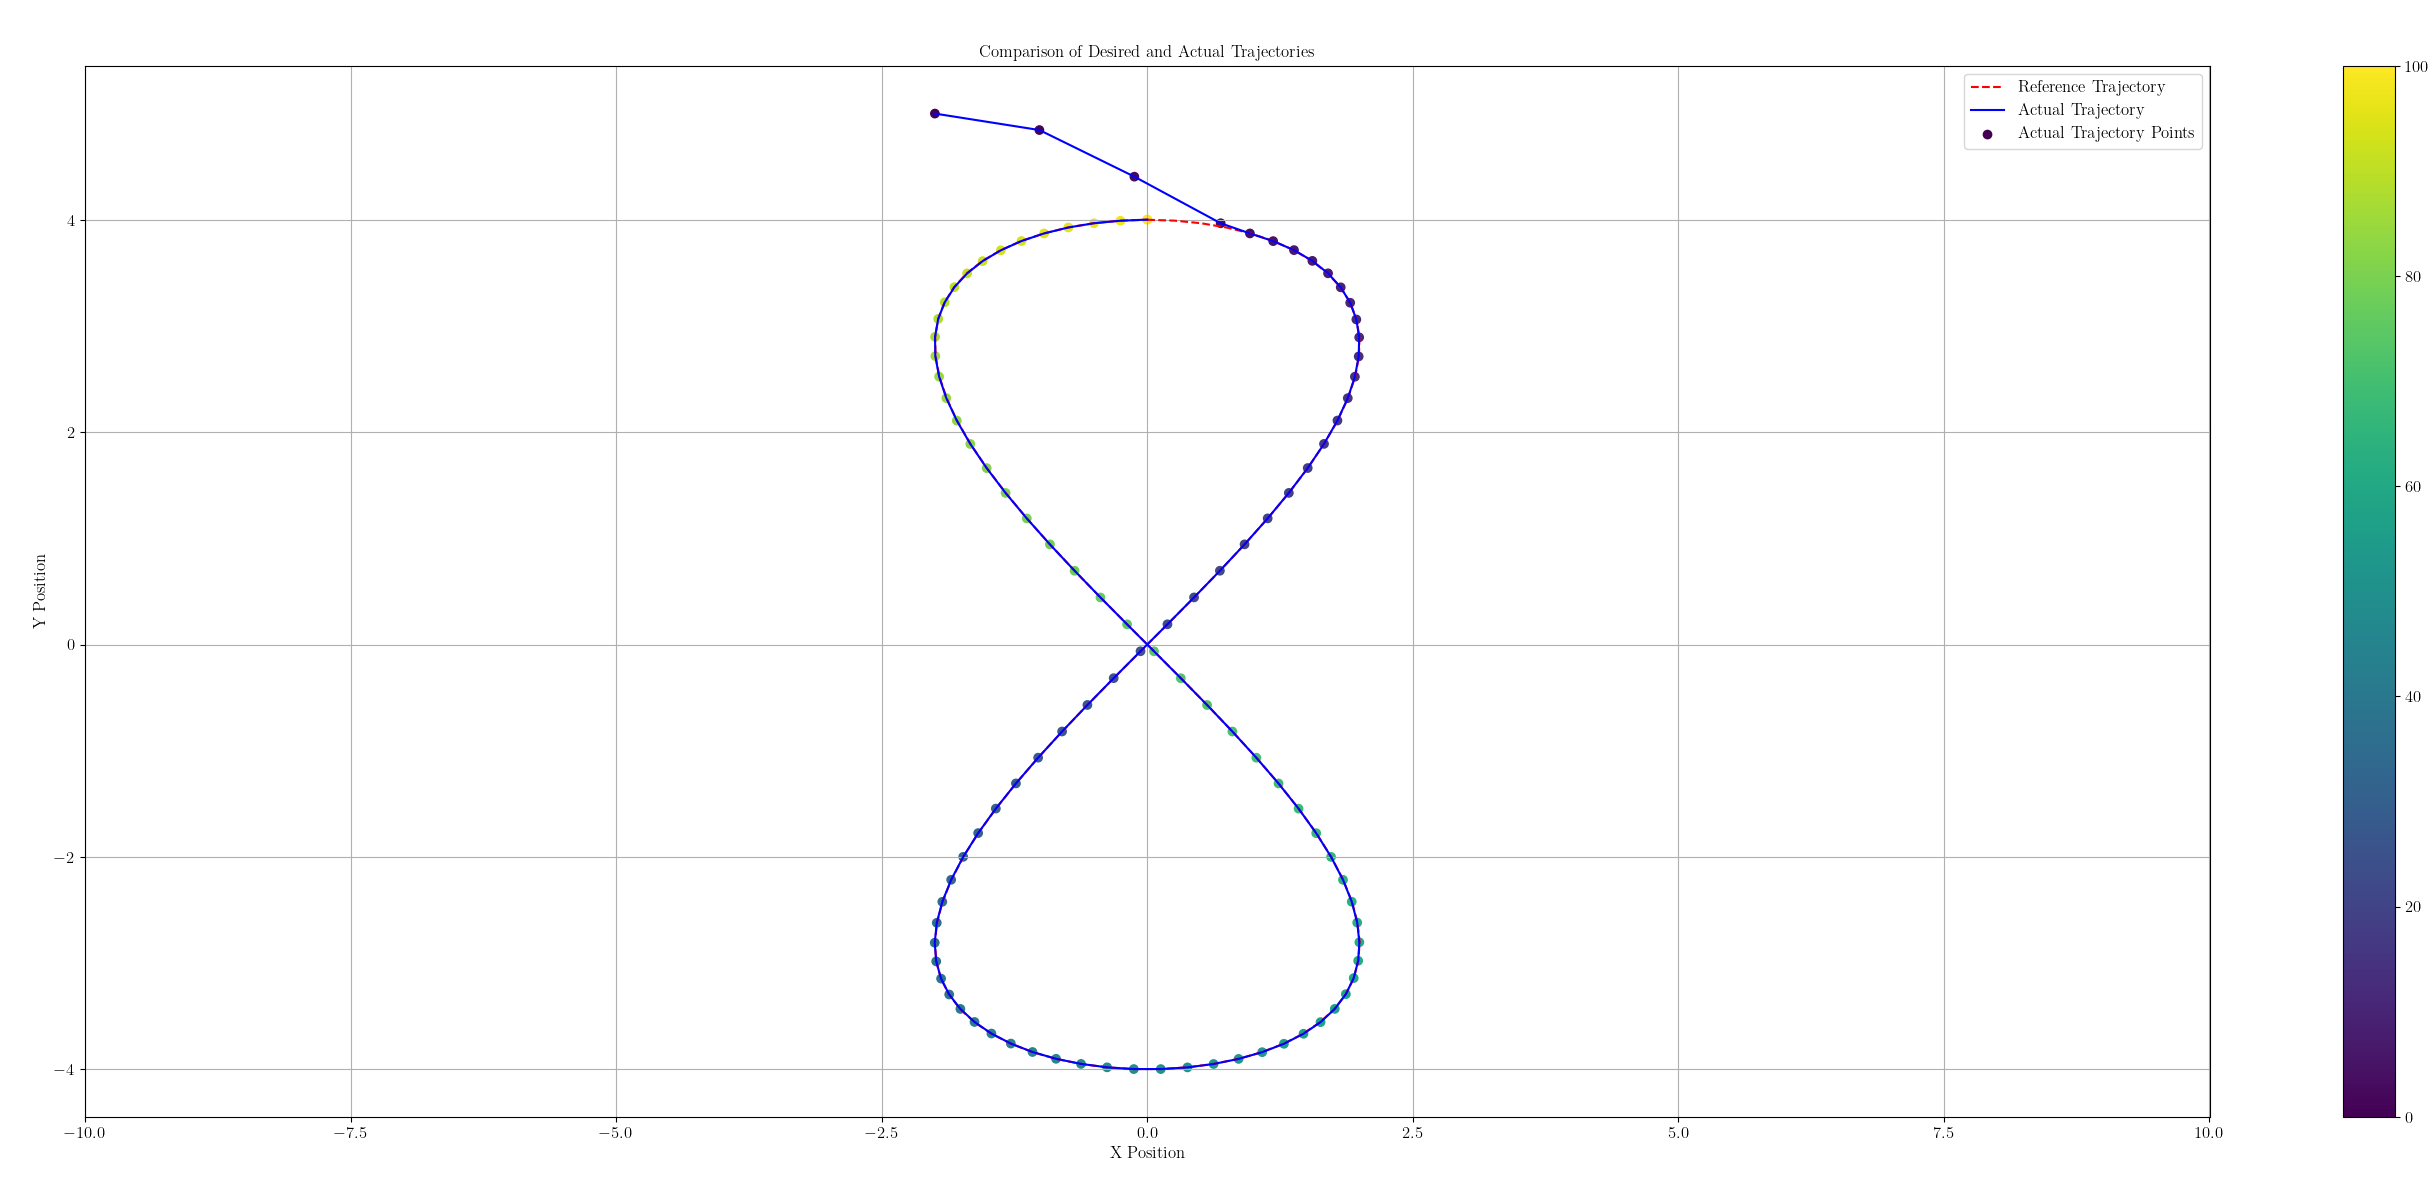
Simulation with 100 points |
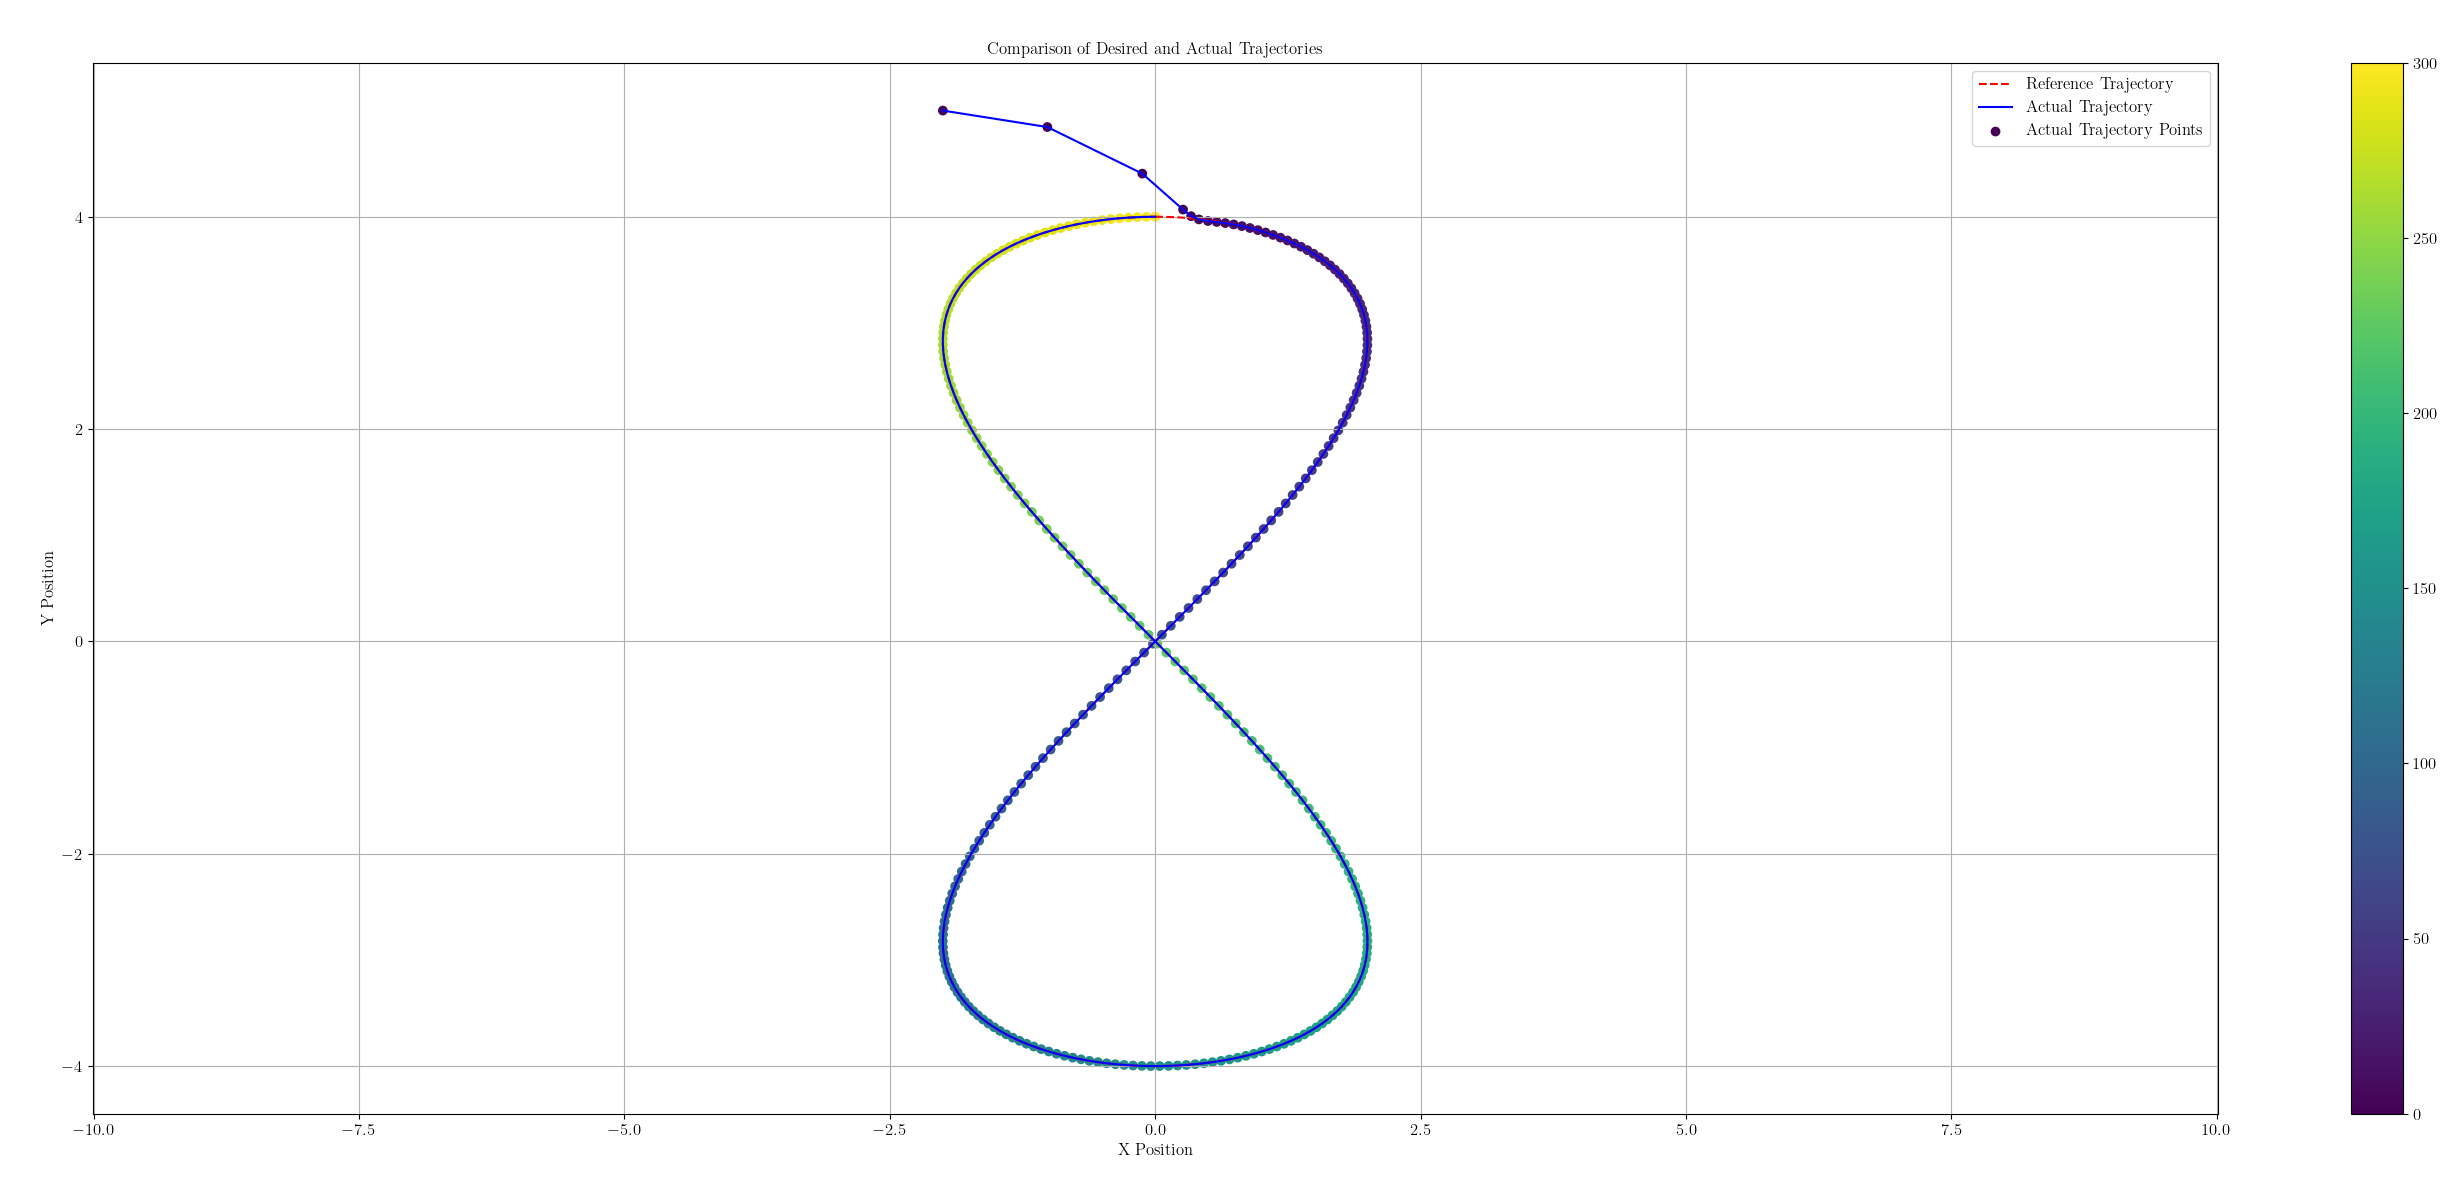
Simulation with 300 points |
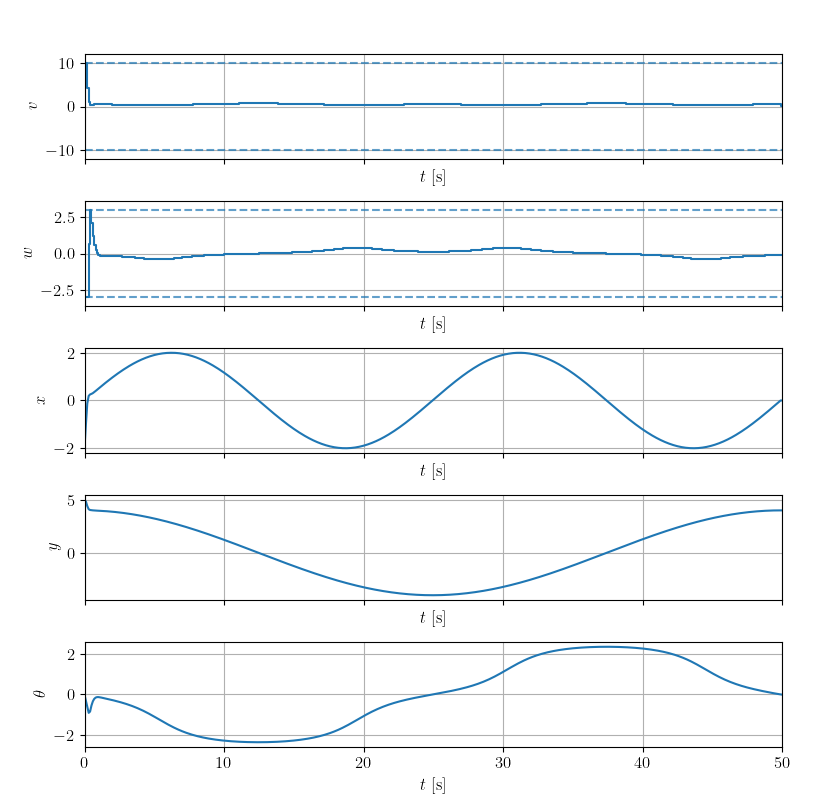
Simulation with 500 points |
Below are simulations starting from three different initial states: X0 = [-2.0, 5.3, -0.00629628], X0 = [-1.0, 3.0, -0.00629628], and X0 = [1.0, 5.0, 1.57629628], respectively. The number of points for each simulation is the same, with a total of 300 points.
|
Simulation with X0 = [-2.0, 5.3, -0.00629628] |

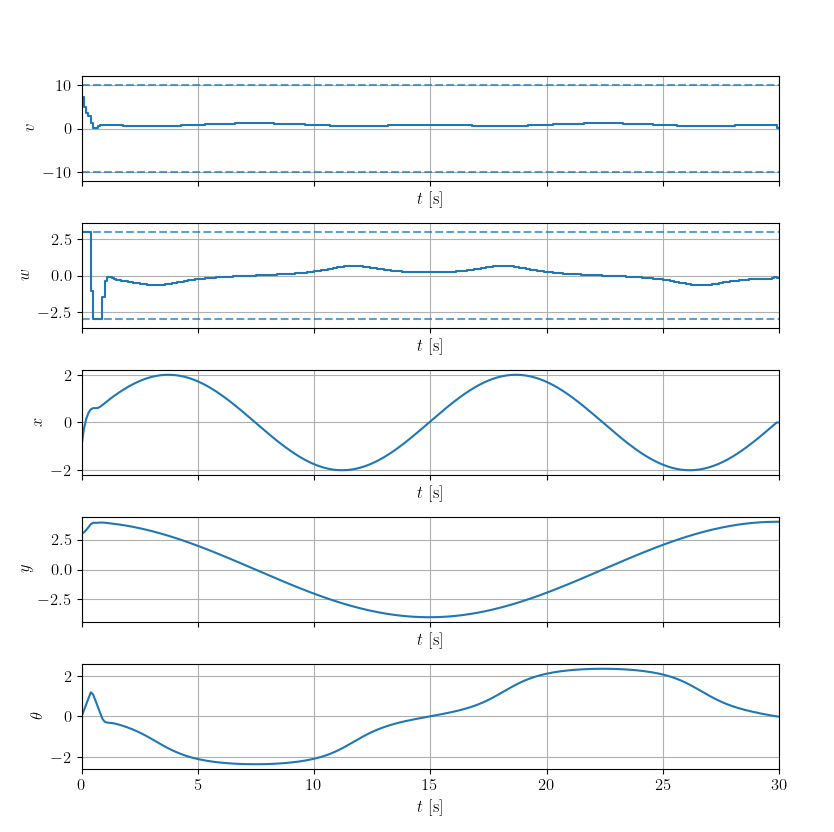
Simulation with X0 = [-1.0, 3.0, -0.00629628] |
Simulation with X0 = [1.0, 5.0, 1.57629628] |
To run the simulation in your own workspace:
In robot_model.py modify your robot model, in create_solver.py modify your ocp definition, in solver.py design your solver, then run:
1 | cd /path/to/scripts/ |
Install ACADOS
Compile ACACOS
following this tutorial (choose CMake part to proceed, not Make) to install
If your Ubuntu is running on WSL, follow the Windows 10+(WSL) part first
Running Example Interface
There are 3 interfaces of ACADOS:
I choose Python Interface (Currently, Python >= 3.8 is tested).
Make sure you compile and install
acadosby following the CMake installation instructions.In one directory you choose, create a Python virtual environment
1
virtualenv env --python=/usr/bin/python3
activate this environment
1
source env/bin/activate
Install
acados_templatePython package (replace thewith the path to your acados ): 1
pip install -e <acados_root>/interfaces/acados_template
Add the path to the compiled shared libraries
libacados.so, libblasfeo.so, libhpipm.sotoLD_LIBRARY_PATH(default path is<acados_root/lib>) by running:1
2export LD_LIBRARY_PATH=$LD_LIBRARY_PATH:"<acados_root>/lib"
export ACADOS_SOURCE_DIR="<acados_root>"Now (2024/6/25) ACADOS has a bug with the HPIPM & BLASFEO targets, so do the following to fix it:
1
2
3
4
5
6
7
8cd <acados_dir>
rm build/* -rf
cd build
cmake .. -DACADOS_WITH_QPOASES=ON -DACADOS_EXAMPLES=ON -DHPIPM_TARGET=GENERIC -DBLASFEO_TARGET=GENERIC
make -j4
make install -j4
# run a C example, e.g.:
./examples/c/sim_wt_model_nx6if you can successfully run a C example, meaning you has fixed this bug
Now run a Python example:
1
2
3cd <acados_dir>
cd examples/acados_python/getting_started/
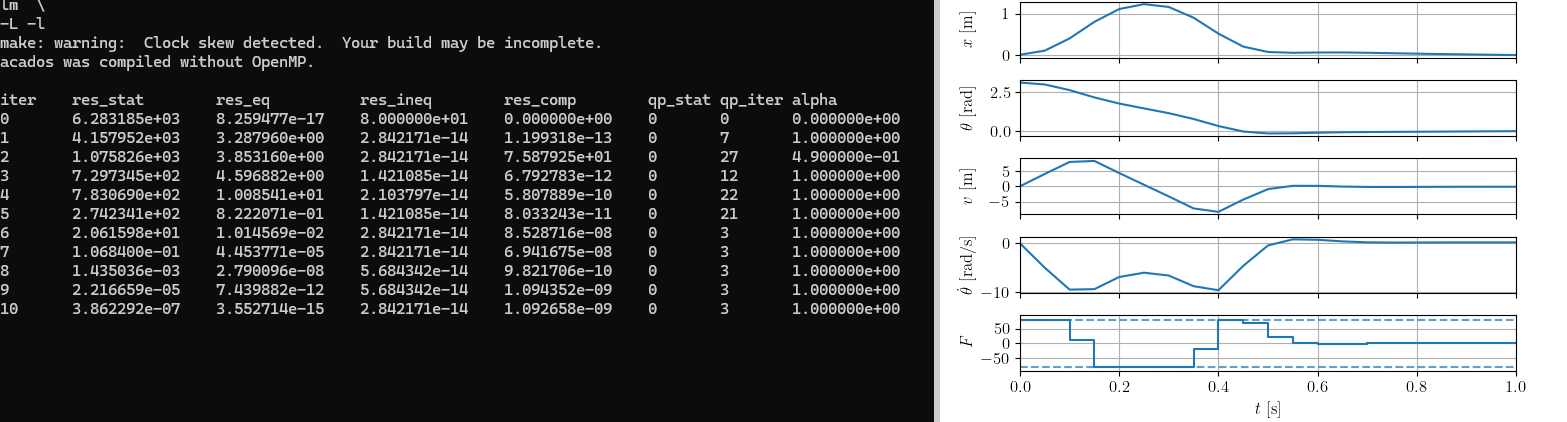
python3 minimal_example_ocp.pyyou will see bug:
! LaTeX Error: File 'type1cm.sty' not found.Now install texlive and its dependencies
1
2
sudo apt install texlive
sudo apt install texlive-latex-extra cm-super dvipngThen run it again:
1
python3 minimal_example_ocp.py
You should see the result like the following: